Manual
The HAL management console features a rich user interface to configure, analyse and monitor the complete WildFly management model. The console uses six top level categories: homepage, deployments, configuration, runtime, patching and access control. In addition HAL uses a header and footer to provide access to global features and give feedback about various states of WildFly and HAL.
This page gives a quick introduction to the main elements in the header and footer and the six top level categories. If you want to learn more about the most common use cases, take a look at the recipes & how to or visit our YouTube channel.
Header
The header shows the current theme and contains the following sections:
- Non processing operations
If configured HAL polls WildFly for non processing operations. In case there are non processing operations a marker is shown in the header. - Reload required
If the server requires a reload or restart, this section shows a button to reload or restart the server. - Notification area
Shows whether there are unread messages. Click on the icon to open the notification drawer which lets you review and manage all unread notifications. - Current user
Shows the current user and its roles. If WildFly uses the RBAC provider and the current user is assigned to role SuperUser this section allows to run the console as a different role. - Connect to management interface
If HAL runs in standalone mode this section allows you to connect to a different management interface.
Footer
The footer contains the following sections:
- Macro recording
If a macro is being recorded, this sections gives feedback about the number of steps recorded so far. See below. - Version information
Opens a dialog showing version information about the console and Wildfly. - Tools
Provides access to various tools. See below. - Settings
Lets you configure console settings like whether to collect user data, the page size for tables or the title of the management console.
Tools
The tools menu contains general functions that are not related to a specific top level category. Some tools open a new application others like the expression resolver open a modal dialog.
Management Model

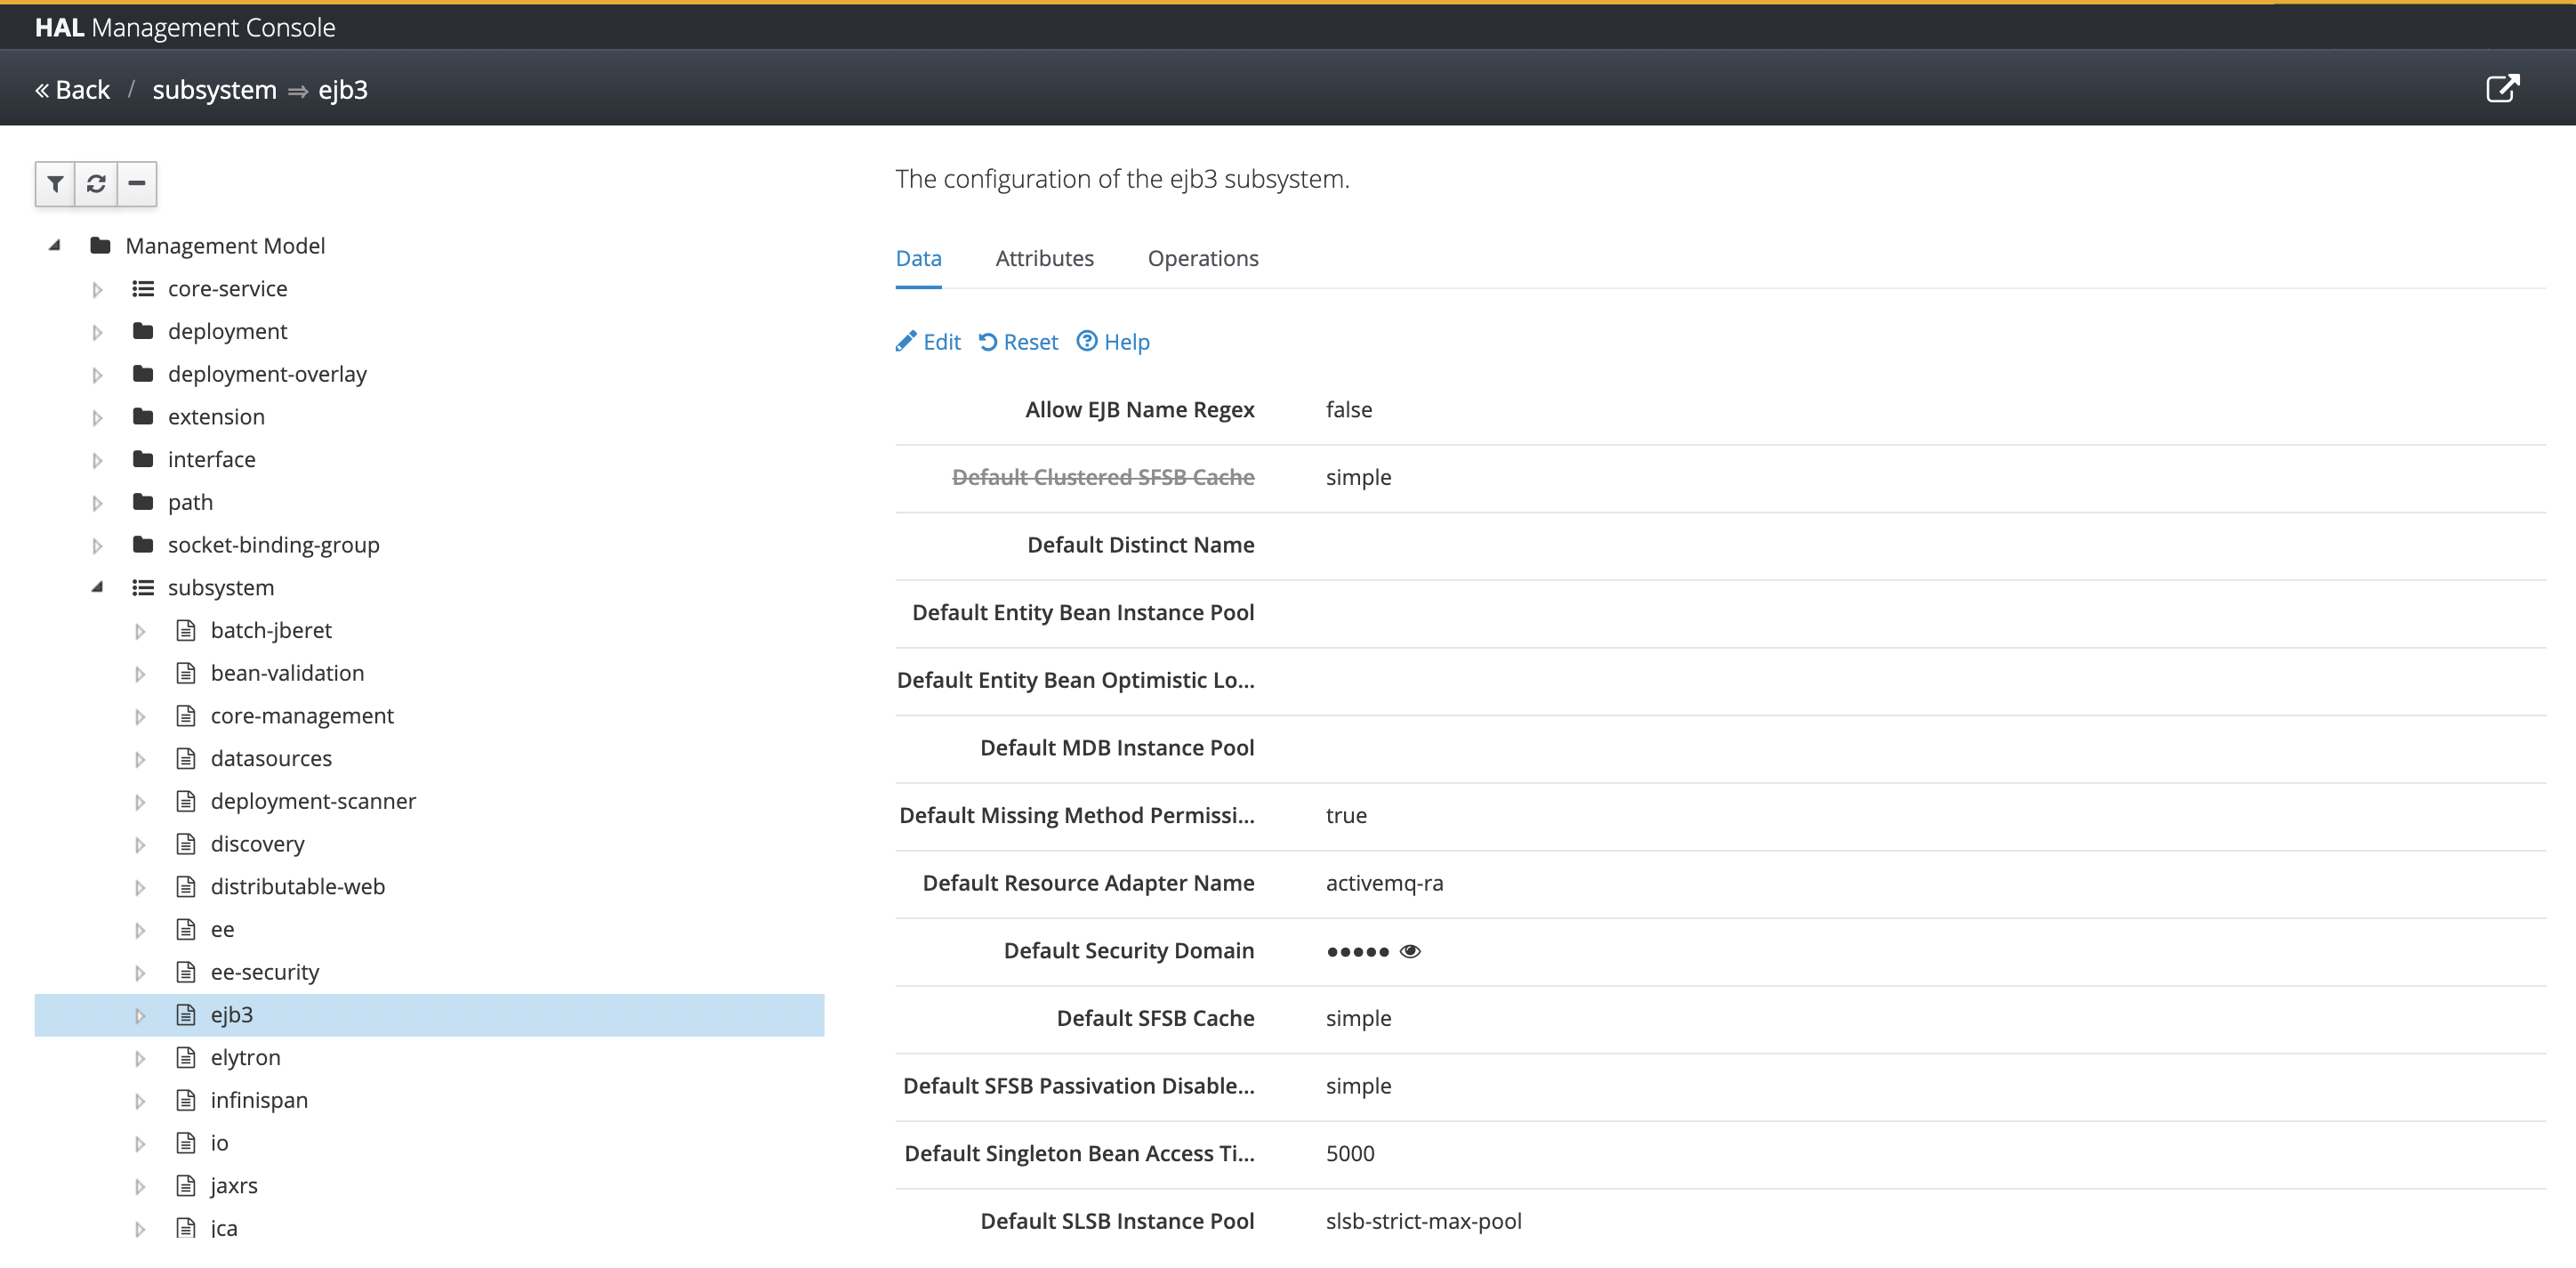
Opens an application which gives you access to the complete management model. The application contains a tree on the left and shows the selected resource(s) on the right.
The tree uses the following icons for the different resource types:
Represents a folder like resource in the management model without attributes. The resource can contain an arbitrary number of child resources which are all of the same type.
/system-property=*is an example for that.Represents a so-called singleton resource. Singleton resources are folder like resources as well, but can only contain a fixed number of child resources which are normally of a different type.
/subsystem=mail/mail-session=default/server=*is an example of a singleton resource. The allowed child resources areimap,pop3andsmtp.Represents a normal resource in the management model with attributes and optional child resources.
/subsystem=ejb3is an example of such a resource.
Depending on the selected item in the tree the right hand side shows either a list of child resources or the attributes of the selected resource. If the selected item is a folder like resource you can add and remove resources. When adding a resource a modal dialog shows up. Use this dialog to specify all required attributes and optionally enter additional attributes.
In case of a normal resource you can view and modify its attributes. In addition you can take a look at the resource descriptions of all attributes and supported operations. Attributes are specified along with their name, type, storage and access type. Operation are listed with their input and output parameters.
Expression Resolver
Opens a modal dialog to resolve expressions. Enter expressions as ${key} or ${key:default} and press resolve to see the resolved value. In domain mode the expressions are resolved against all running servers.
Macro Recording

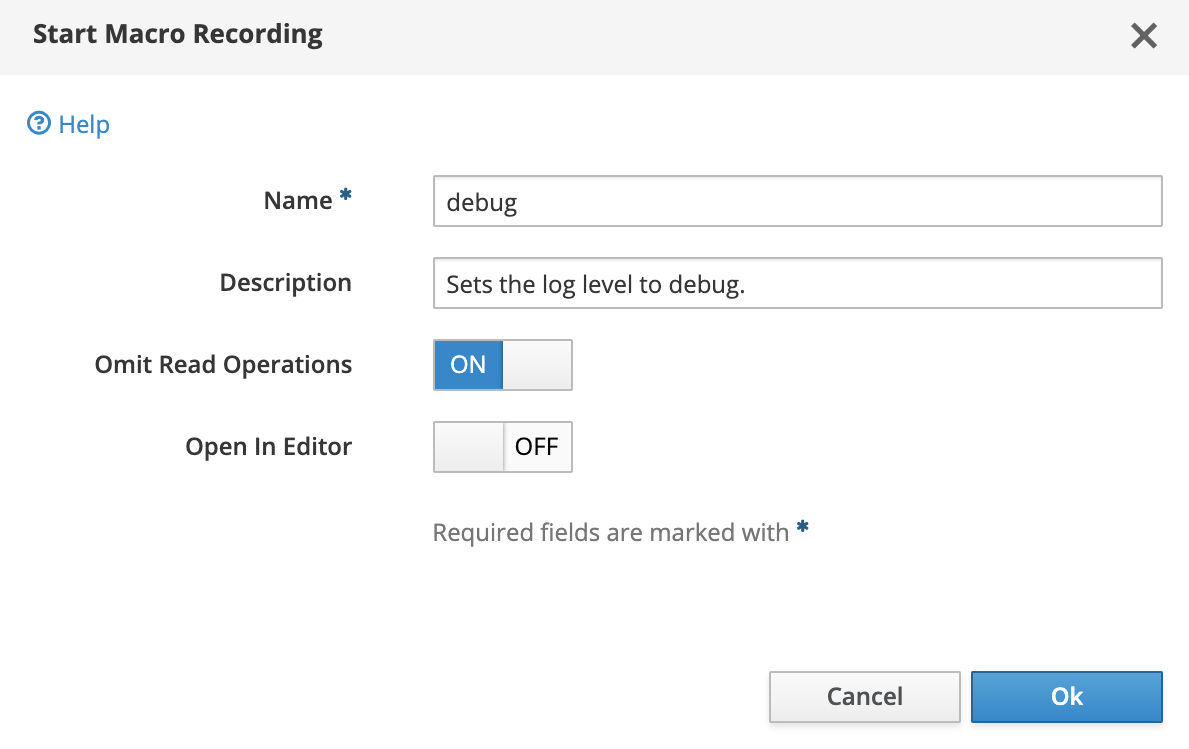
When you make modifications to the management model, HAL can record the related operations as macros. To start a macro recording select “Start Macro Recording” from the tools menu. In the upcoming dialog you have to choose a unique name for the macro and provide an optional description. Finally you can choose whether to omit read operations during recording and whether the macro should be opened in the macro editor after recording has been stopped.
Once you’ve started macro recording, a pulsing icon in the footer will give you feedback that a macro is being recorded and how many operations have been recorded so far. The item in the tools menu will change from “Start Macro Recording” to “Stop Macro Recording”. During recording you can use the management console as usual. Every operation (read operation might be omitted) is stored as part of the macro.
If you’re done with recording select “Stop M acro Recording” from the tools menu. Depending on the “Open In Editor” option the macro will be opened in the macro editor. You can always open the macro editor from the tools menu. The macro editor shows all recorded macros. Use the macro editor to see the recorded operations, to reply macros or to copy & paste the operations. The operations are shown as you would enter them in the CLI.
Please note that uploads (i.e. deployments and patches) cannot be recorded as part of a macro.
Homepage

The homepage provides an overview of the top level categories in the console. For each section there’s a short introduction followed by a step-by-step guide of the main use case. Links allow you to jump directly into the topic. Finally the homepage provides a list of related resources and additional help.
The homepage is the page which is opened by default and you can always go back to the homepage by clicking on the logo in the header.
Deployments

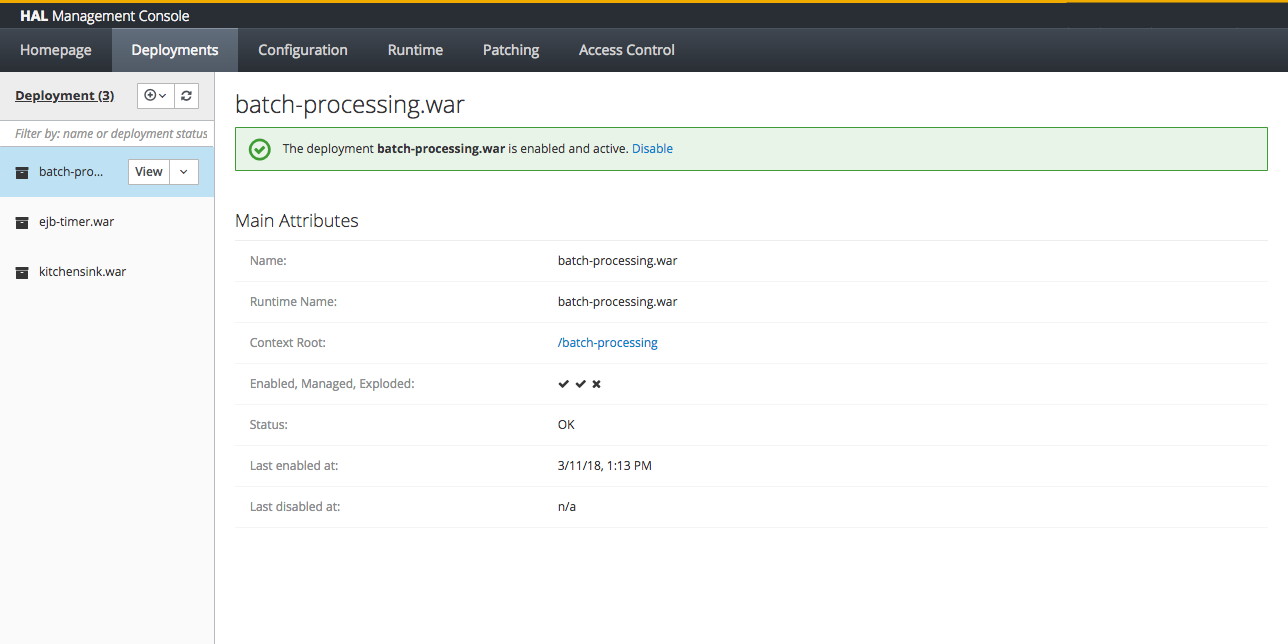
The deployment section is all about adding and managing deployments. You can upload existing deployments, add unmanaged deployments or create new empty deployments for quick prototyping.
In a managed domain, deployments are associated with a server-group. Any server within the server group will then be provided with that deployment. The domain and host controller components manage the distribution of binaries across network boundaries.
The most common use case is to add one or several deployments. This can easily be done by simply dragging and dropping the deployments across the deployment column. Alternatively you can use a wizard to upload deployments. This allows you to decide whether the deployment should be started after the upload. Per default deployments are enabled (started) by default in standalone mode and disabled (stopped) by default in domain mode.
If there’s already a deployment with the same name, the deployment will be replaced, otherwise the deployment will be added.
In general deployments can have different states:
- enabled / disabled
- managed / unmanaged
- archived / exploded
Enabled / Disabled
Once a deployment has been enabled it is active and can be accessed by the user. If the deployment defines a context root, it’s visible in the deployment preview. As mentioned above, when you upload a deployment it is enabled by default in standalone mode and disabled by default in domain mode.
Managed / Unmanaged
WildFly supports two mechanisms for dealing with deployment content – managed and unmanaged deployments.
With a managed deployment the server takes the deployment content and copies it into an internal content repository and thereafter uses that copy of the content, not the original user-provided content. The server is thereafter responsible for the content it uses.
With an unmanaged deployment the user provides the local filesystem path of deployment content, and the server directly uses that content. However the user is responsible for ensuring that content, e.g. for making sure that no changes are made to it that will negatively impact the functioning of the deployed application.
Managed deployments have a number of benefits over unmanaged:
- They can be manipulated by remote management clients, not requiring access to the server filesystem.
- In a managed domain, WildFly/EAP will take responsibility for replicating a copy of the deployment to all hosts/servers in the domain where it is needed. With an unmanaged deployment, it is the user’s responsibility to have the deployment available on the local filesystem on all relevant hosts, at a consistent path.
- The deployment content actually used is stored on the filesystem in the internal content repository, which should help shelter it from unintended changes.
Archived / Exploded
Managed and unmanaged deployments can be ’exploded’, i.e. on the filesystem in the form of a directory structure whose structure corresponds to an unzipped version of the archive. An exploded deployment can be convenient to administer if your administrative processes involve inserting or replacing files from a base version in order to create a version tailored for a particular use (for example, copy in a base deployment and then copy in a jboss-web.xml file to tailor a deployment for use in WildFly.) Exploded deployments are also nice in some development scenarios, as you can replace static content (e.g. .html, .css) files in the deployment and have the new content visible immediately without requiring a redeploy.
Please note that you have to disable a deployment, before you can explode it. Once exploded you can use the console to browse the deployment’s content, add, replace or remove files.
Configuration

The configuration section provides access to all important resources used to configure the server. This includes
- subsystems
- interfaces
- socket bindings
- paths
- system properties
The majority of the configuration section are the subsystems. By default the console lists all subsystems in alphabetical order. Depending on the profile in domain mode and the used configuration file in standalone mode, this list includes different entries.
More complex subsystems like Infinispan or messaging add additional columns to the finder. Other simpler subsystems are managed by a single application.
Runtime
The lifecycle operations for hosts, server groups and servers have been improved. New operations are available for hosts and disconnected hosts are now shown in the finder columns. For servers you can specify custom URLs which is extremely useful when running WildFly inside a docker container.
Topology

The topology view shows the hosts, server groups and server of your domain. You can quickly see the state of your hosts and servers and execute the most importatn operations such as start, stop, suspend and resume.
Monitoring

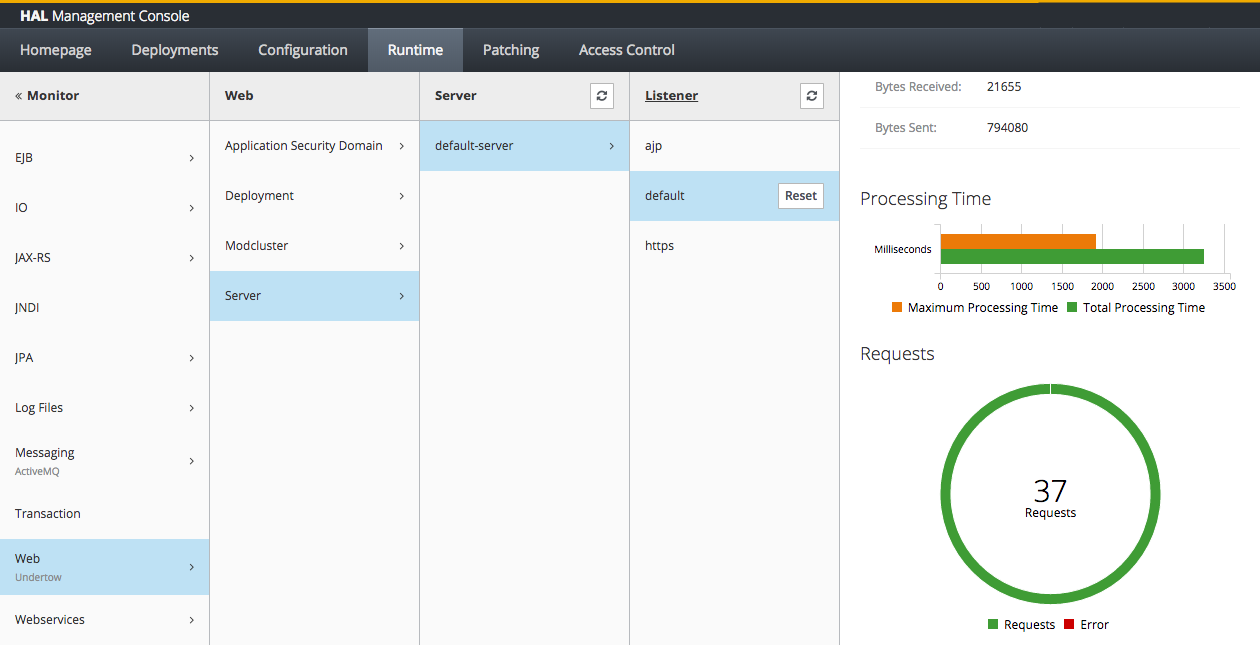
The runtime section is used to control the lifecycle of hosts, server groups and servers. In addition you can monitor runtime data and statistics provided by the various subsystems. You can also enable and view configuration changes. Finally you can view the JMX beans and browser the server log files.
The existing screens have been improved and many new subsystems have been added to the monitoring section. Some of the new and enhanced subsystems are:
- Batch
- EJB
- IO
- JAX-RS
- Messaging
- Web (Undertow)
Patching
The patching section is used to upload and manage patches. The method of applying a patch to WildFly depends on your installation method. If you installed WildFly using the ZIP or installer methods, you must use the ZIP-based patch management system. If you used RPMs to install WildFly on Red Hat Enterprise Linux, you must use RPM patches.
Before applying or rolling back a patch, you should back up your WildFly server, including all deployments and configuration files.
Cumulative patches for a ZIP or Installer installation of WildFly are available to download from the Red Hat Customer Portal.
For multiple WildFly hosts in a managed domain environment, individual hosts can be patched from your WildFly domain controller.
In addition to applying a patch, you can also roll back the application of a patch.
Access Control
WildFly introduces a Role Based Access Control scheme that allows different administrative users to have different sets of permissions to read and update parts of the management tree. This replaces the simple permission scheme used in JBoss AS 7, where anyone who could successfully authenticate to the management security realm would have all permissions.
WildFly ships with two access control providers, the “simple”, and the “rbac” provider. The “simple” provider is the default and provides a permission scheme equivalent to the JBoss AS 7 behavior where any authenticated administrator has all permissions. The “rbac” provider gives the finer grained permission scheme that is the focus of this section.
The access control scheme implemented by the “rbac” provider is based on seven standard roles. A role is a named set of permissions to perform one of the actions: addressing (i.e. looking up) a management resource, reading it, or modifying it. The different roles have constraints applied to their permissions that are used to determine whether the permission is granted.
Roles
The seven standard roles are divided into two broad categories, based on whether the role can deal with items that are considered to be “security sensitive”. Resources, attributes and operations that may affect administrative security (e.g. security realm resources and attributes that contain passwords) are “security sensitive”.
Four roles are not given permissions for “security sensitive” items:
Monitor – a read-only role. Cannot modify any resource.
Operator – Monitor permissions, plus can modify runtime state, but cannot modify anything that ends up in the persistent configuration. Could, for example, restart a server.
Maintainer – Operator permissions, plus can modify the persistent configuration.
Deployer – like a Maintainer, but with permission to modify persistent configuration constrained to resources that are considered to be “application resources”. A deployment is an application resource. The messaging server is not. Items like datasources and JMS destinations are not considered to be application resources by default.
Three roles are granted permissions for security sensitive items:
SuperUser – has all permissions. Equivalent to a JBoss AS 7 administrator.
Administrator – has all permissions except cannot read or write resources related to the administrative audit logging system.
Auditor – can read anything. Can only modify the resources related to the administrative audit logging system.
